When something happens I tend to create a project and that is the way I can literally exhaust myself in order to deal with my grief. The loss of Memphs was so devastating to me and so I decided to tackle my pantry. I had no clue HOW to fix it – I just knew I loathed it.
Backstory – The pantry at one time had been a laundry room and when they added a laundry room (the reaso we bought the house the 12 x 20 Laundry Room also is home to the Calabrone Crew) and so now this awkward space literally in the kitchen (because that makes it easy do laundry while cooking) was too big to be a simple shelf pantry but not big enough to be a walk in pantry. My thought had been to do hidden bookshelves in lieu of the big screaming I USED TO BE A LAUDRY CLOSET doors and simple shelves and my furniture guy was supposed to start work on the doors soon so I would clean up the shelves.
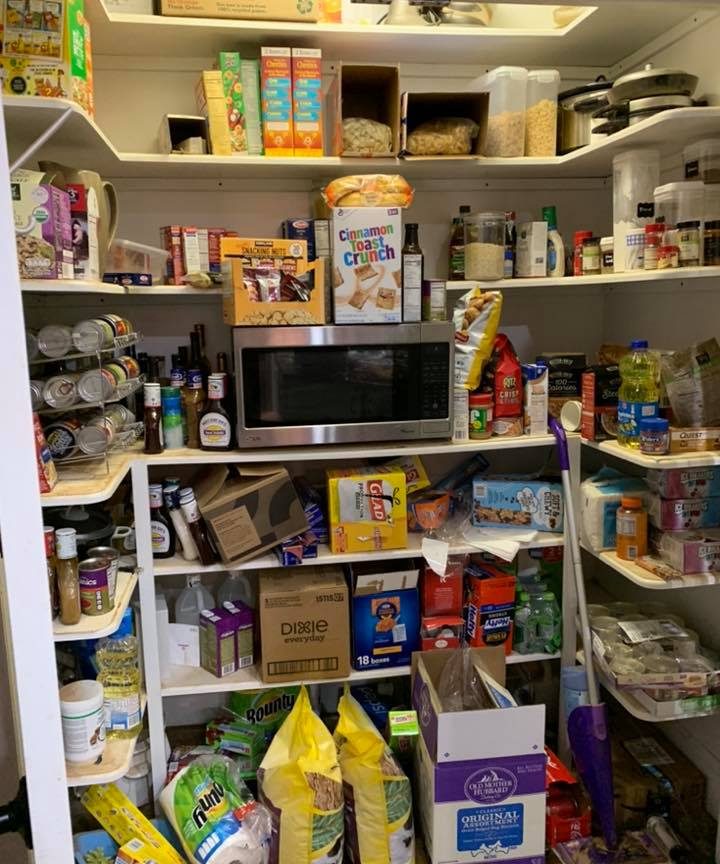
You ask how ugly were they? this ugly, this poorly designed. This awful. The shelves had this contact paper like stuff on it that turned yellow so it always looked dirty, I had tried even putting bleach on overnight and they still looked dirty. The layout was bad and so I started just cramming things in places and then would end up with multiples and then would end up throwing away stuff that had expired and so then having to go to the store and then continuing the cycle.
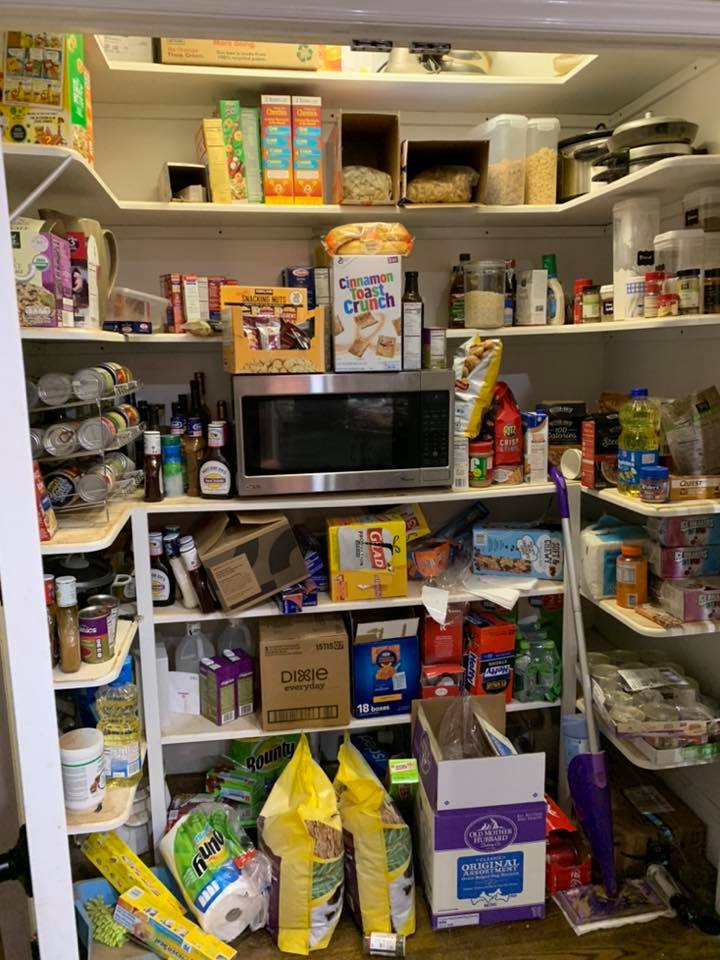 The doors were ugly and they made a smaller kitchen feel smaller – basically I hated this pantry more than any other thing. We bought the house for location, location, location with the over an acre footprint, great space for the dogs and a master downstairs. It was 35 plus years old and we have been slowly updating as we go (which will be highlighted in further blog posts) but this eyesore was front and center.
So I went onto Pinterest and began researching ideas and looks. We kind of have this what I call cottage look going on – I like things that look either new or old meaning you cannot tell if it has been in the house for years but in great shape. It is kind of a rustic and industrial vide – I like both of those styles which still can be classic – I am not going to remodel every three years so what I buy needs to be more timeless than trendy. Plus the house itself is very casual. We have no formal spaces – it is a casual vibe and it fits us.
The first thing I did was realize I needed to organize into zones – I loved this. Basically store stuff in groups BUT at the same time as needed. So put the stuff that is used a lot lower and the stuff rarely used higher. No need to stay at a Holiday Inn Express for that! But also I love the basket / box idea – this works for me because when Harris Teeter has a Buy 2 get 3 free I buy – and is why I end up with 142 boxes of Rice A Roni but actually cook it less than once a month. The basket and boxes force me to not overbuy. I also can ensure I take the item that is the oldest first so I don’t end up with 138 boxes of Rice A Roni and only 2 both a flavor I hate are goof to use.
So I pulled everything out of the pantry and grouped it into zones:
- Baking stuff (flour / sugar etc)
- Spices
- Oils
- Pasta
- Canned (mostly tomatoes and green beans for Sting)
- Boxed starches
- Sauces
I then eliminated all the old stuff and reviewed what was left. Interestingly I had three crepe makers which is weird since I have never made a crepe before in my life and other assorted appliances that had been stored up top which meant never used (like this big roasting pan – every Thanksgiving I buy a cheap aluminum one – who knew I had one!) And my dilema was that if I built shelves and stuck them way back up I would repeat the issue of out of sight out of mind.
Plus Costco moved into town and my beloved Amazon Prime – I tend to buy some items in bulk so how to store that but not overwhelm my new pantry. Again I was going through Pinterest and I would see these walk in pantries that had cabinets. It hit me that I could put cabinets in which would keep items off the ground (this is a great black hole area where I would shove things and then not think I had any and then go buy more) but also allow better storage.
I measured across and it was 74 inches across and I realized I could put a big three drawer pots and pan cabinet and anchor with two regular cabinets to store bulk items and some appliances etc. The pantry is basically 3 feet deep and 6 feet wide – I made the decision to not do those weird wrap around shelves but instead three 12 inch wide shelves across the back plus the cabinets. This meant I could access all of the shelves but at the same time not have so many that I would be chosing where to place things based on the height.
Cabinets ordered so then I started to decide on containers – I ended up buying a bunch of things then anything I did not like or need went to the dogs storage area (all of the clear plastic stuff – in the end I did not like the look for the pantry) and found that wire baskets and wood boxes in varying shapes were the look I liked – basically they were new but looked well used like they had been here all 35 years.
So I started seeing what fit and looked good in what and began creating zones:
Zone 1 – living on cabinet counter
- Microwave (too big for the counters so it had lived in the pantry before)
- Vegetables / fruits not needing refrigeration
- Snack stuff
- Paper Plates / napkins
Zone 2 – living on the first shelf
- Pasta
- Cereal
- Oils / spices /baking items
Zone 3 – living on second shelf
- Extra liquid items (vniegar / specialty olive oil etc)
- Canned goods
- Boxed starches
- Marinades /sauces
Zone 4 living on top shelf
- Paper towels (Amazon Bulk)
- Extra cereal (Costco bulk)
- refills for item listed below
Zone 5 Cabinets
- Foils
- Pots / Pans
- Useful appliances that I can now use and reach
I played around with the items and the storage and realized my OCD kicked in and I decided that all my spices needed to be in a similar container so I had to transfer them. So at this point we started ripping out the old shelving. I thought it would be east but it was not – they had those suckers in strong but I finally was able to take those nasty shelves to the recycling center. At that point I realized the stark white walls would not work but I did not really want to paint but if I put up new shelves with the white and the fact I had to patch holes it would look like a “lipstick on a pig” situation.
 I started trying to think of something then an episode of Property Borthers was talking about faux bricks and I thought that could look cool and then as I researched I found something intriguing – peel and stick wallpaper! I read the reviews because I loathe wallpaper – I loathe putting it up but I loathe pulling it down more. This stuff claimed to be easy to put up AND easy to take off. So I decided I could but one roll and try it out. I started out at faux brick but then found this faux distressed wood and liked it and ended up buying 4 rolls (later I bought two more because I ran out in a spot and it came in 2’s). Let me say this – it is LIFE CHANGING. First it is easy to put up, second it is vinyl so you can wipe anything up off it. Third it looks real. Okay it does until you touch it but lets be honest it is in a pantry not a deature wall in my house so the fact it is fake works. It covered the walls and took about 30 minutes to put up.
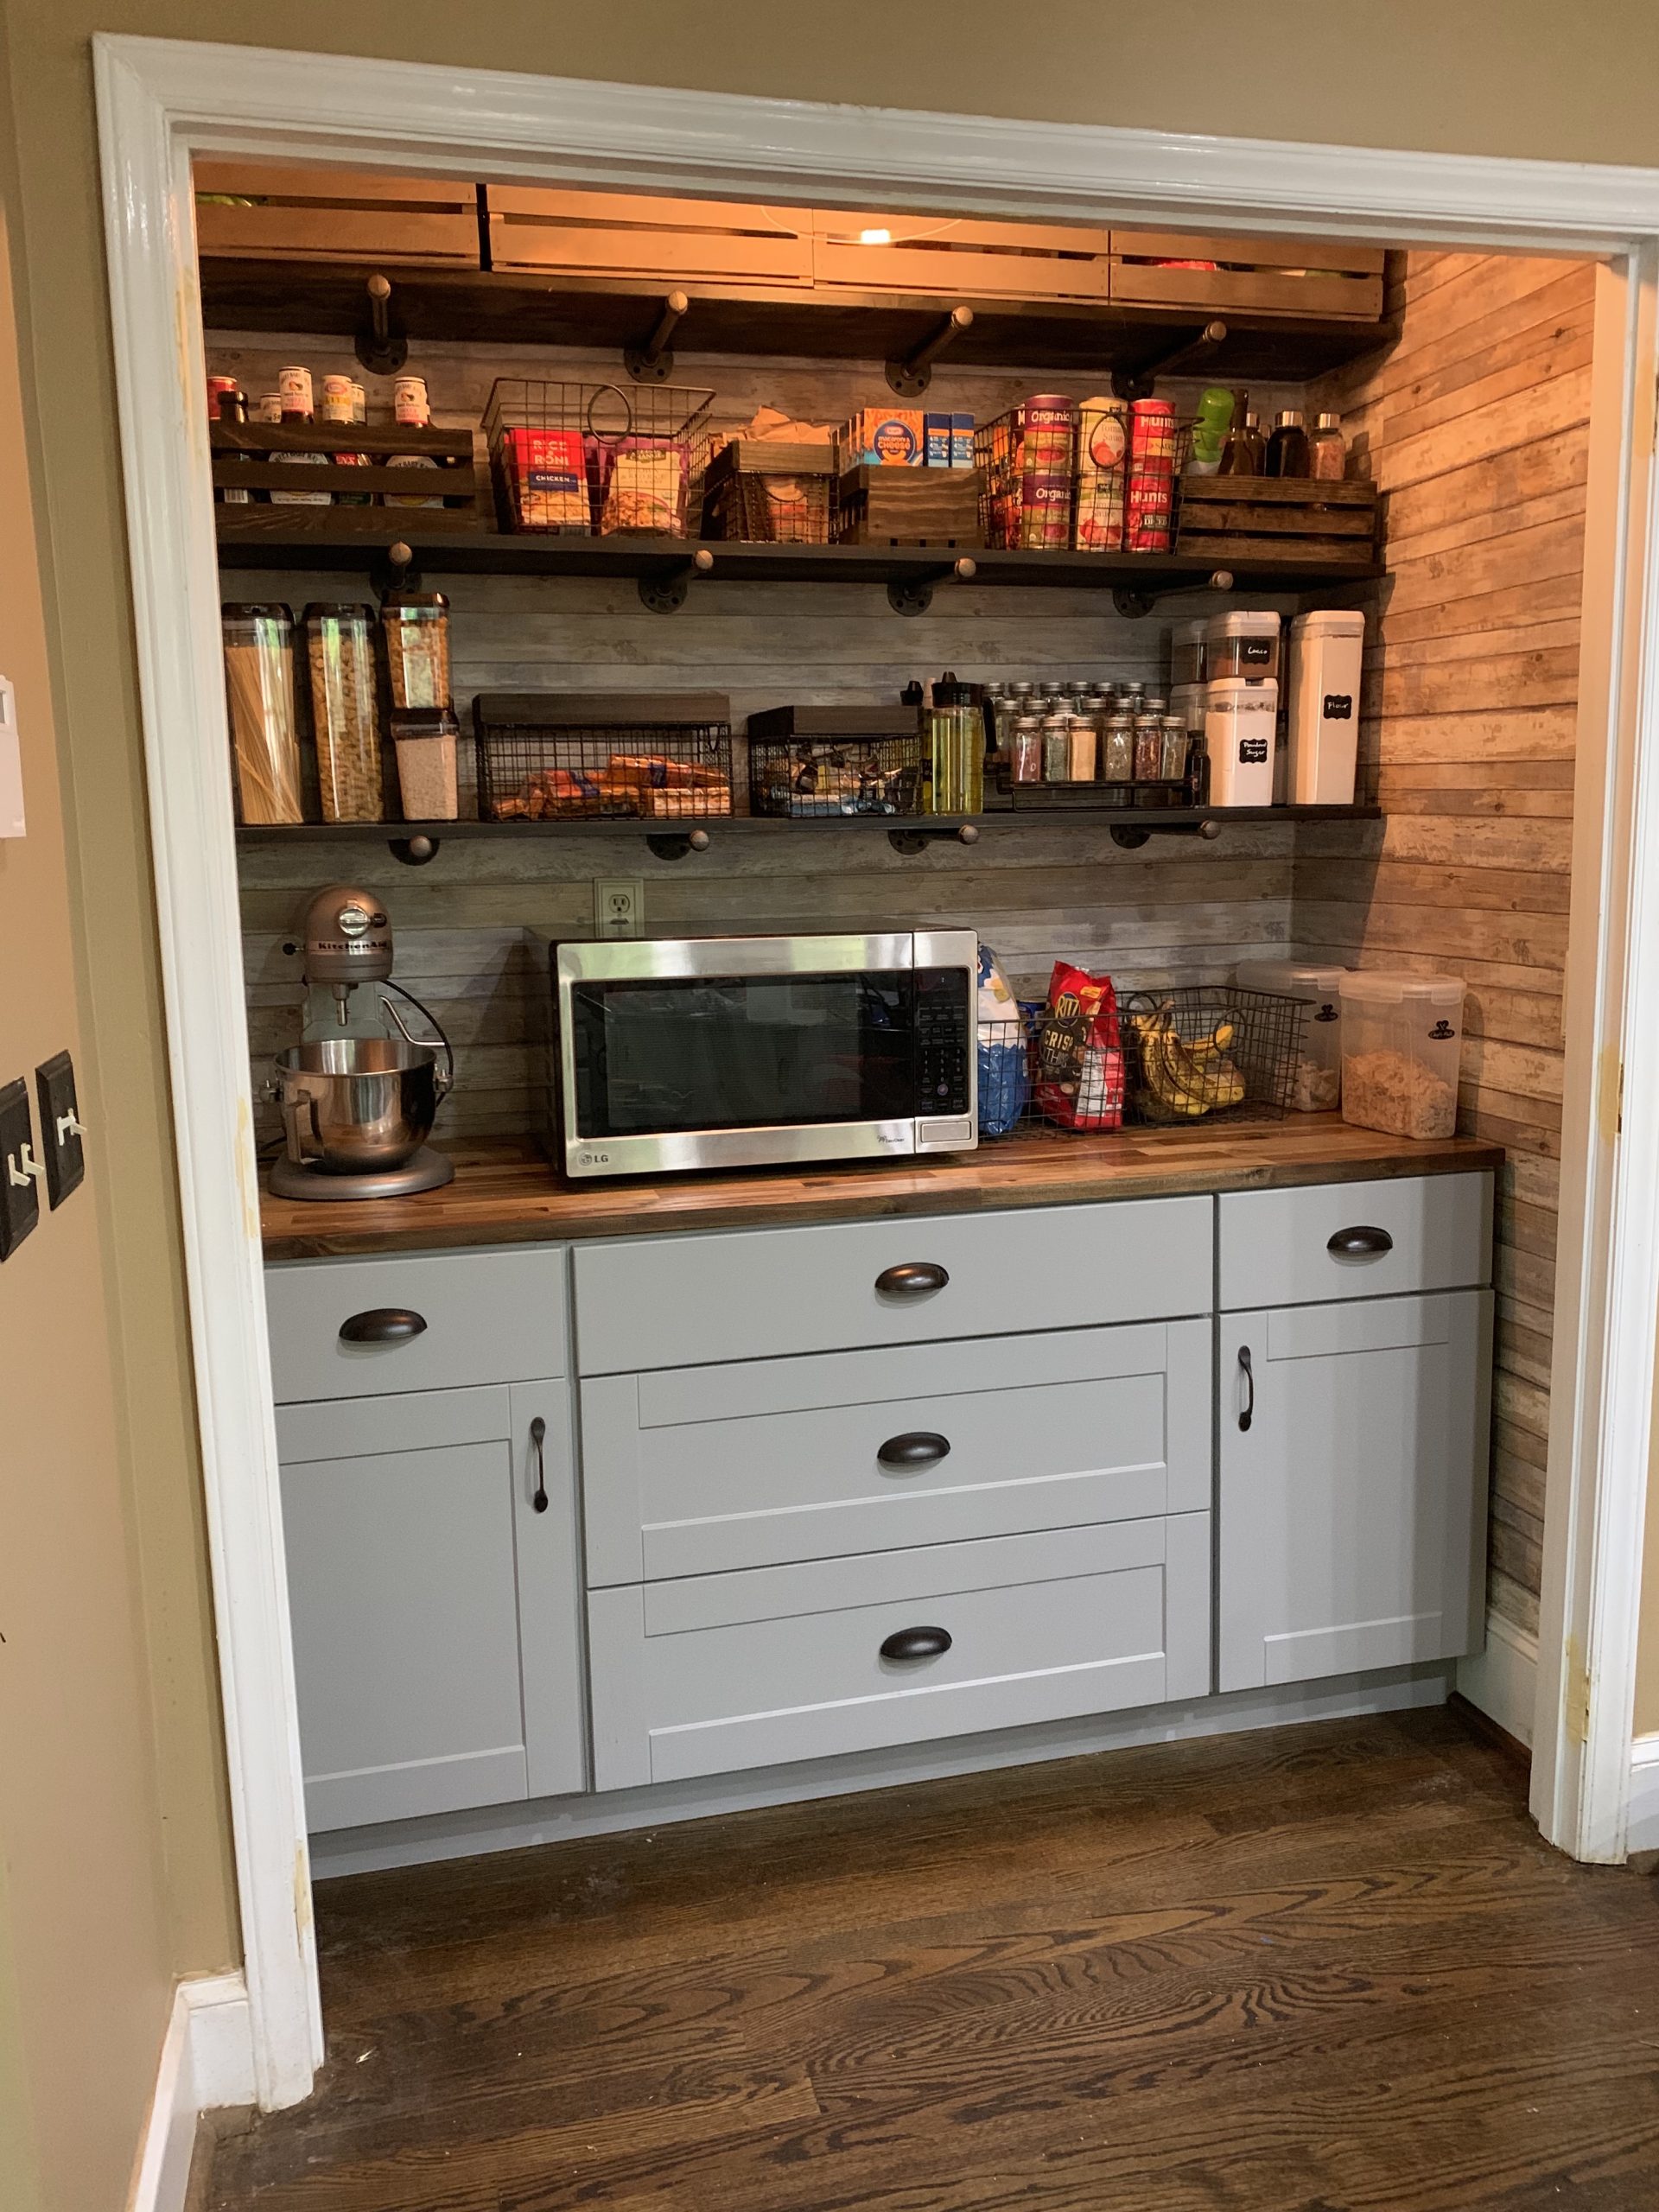
For the shelves I went to either Home Depot or Lowes and got 12 inch wide 6 foot lumber and painted them and dark grey color – almost black. I decided on industrail pipe brackets and I have bought them on Etsy before but I needed them fast so I went to Amazon. We also decided to change out the old flourescent light for something nicer. After the light and wallpaper went up I installed the shelves (I now love power tools) and put the shelf zones together and then had to wait on the cabinets as they were taking longer than anticipated (Hurricane Dorian so I could not complain too much).
When the cabinets got here I freaked out because I measured for 72 inch cabinets for a 74 inch space – forgot the molding and quarter round – YIKES. I was like 3/4 of an inch too big. So I had to pull off the quarter round and then put it back on oce the cabinets were in where it was visible – mental note folks measure from the bottom not the wall! Cabinets installed as well as the butcher block. Again I wanted a feeling that this was supposed to be here this was never a laundry space (we took the doors off too) and so I thought the wood counter made more sense. FInal step was doing the cabinet pulls which was harder than anticipated but I got them on and stepped back and realized – it was now so pretty I did not want the hidden door bookshelf! I loved it as is!
I think all in it was about $1500 with the largest part the cabinetry and I usually try to make decisions on what to do by it either being something I want and know there will be no resale value or if it is something I want that will add value. I do think this is the former – when / if we sell this pantry will not add any value but it will definitely negate the former negative which was a bit of an eyesore. It also makes the kitchen feel bigger and solves any lack of storage issue. So I do feel it was money well spent.
Everything I did was DIY friendly and probably saved this from being a budget buster if I had to hire people to do this. I also did some things cheaper and I think better like building my own shelves versius the cheap or really expensive big bx store shelves. In the end I am not only pleased with this but I think it looks like it is something I would have found on Pinterest or in a model home. A week in and I did not over shop at Harris Teeter (big sale on rice I resisted) and I actually used my mixer because I could get to it!
Anyway I am going to start adding more bosts on some of the work we are doing – I decided that I will stll do the hidden door idea but will create a wall wine rack inset for the door to the old pantry now housing cleaning supplies. So that will be next month – stay tuned for that one!
(Note: I think we will remove the door casing and probably take the drywall above off and make it to look more like an insent but that is not a DIY thing so it will have to wait)
Photo Gallery of the work
[widgetkit id=65]
Below are links to the things I used (no affiliate links or click bait)
Butcherblock Counter (Home Depot)
Vegetable Oil container (Amazon)